The first step in building a Cisco Catalyst SD-WAN home lab is not setting up the virtual machine. It is not downloading the software images or deploying the controllers.
The first real step is getting access to a Cisco Smart Account.
As we discussed earlier in the book, every Cisco SD-WAN deployment starts with a Smart Account/Virtual Account. This is true even for a small home lab. Think of it as the main container for your SD-WAN environment. It is where you keep track of important SD-WAN information such as:
- controller profiles
- device ownership
- serial numbers
- the WAN Edge device list
- smart licensing
- plug and play
This makes the Smart Account one of the core building blocks of any Catalyst SD-WAN deployment, as shown in the diagram below.

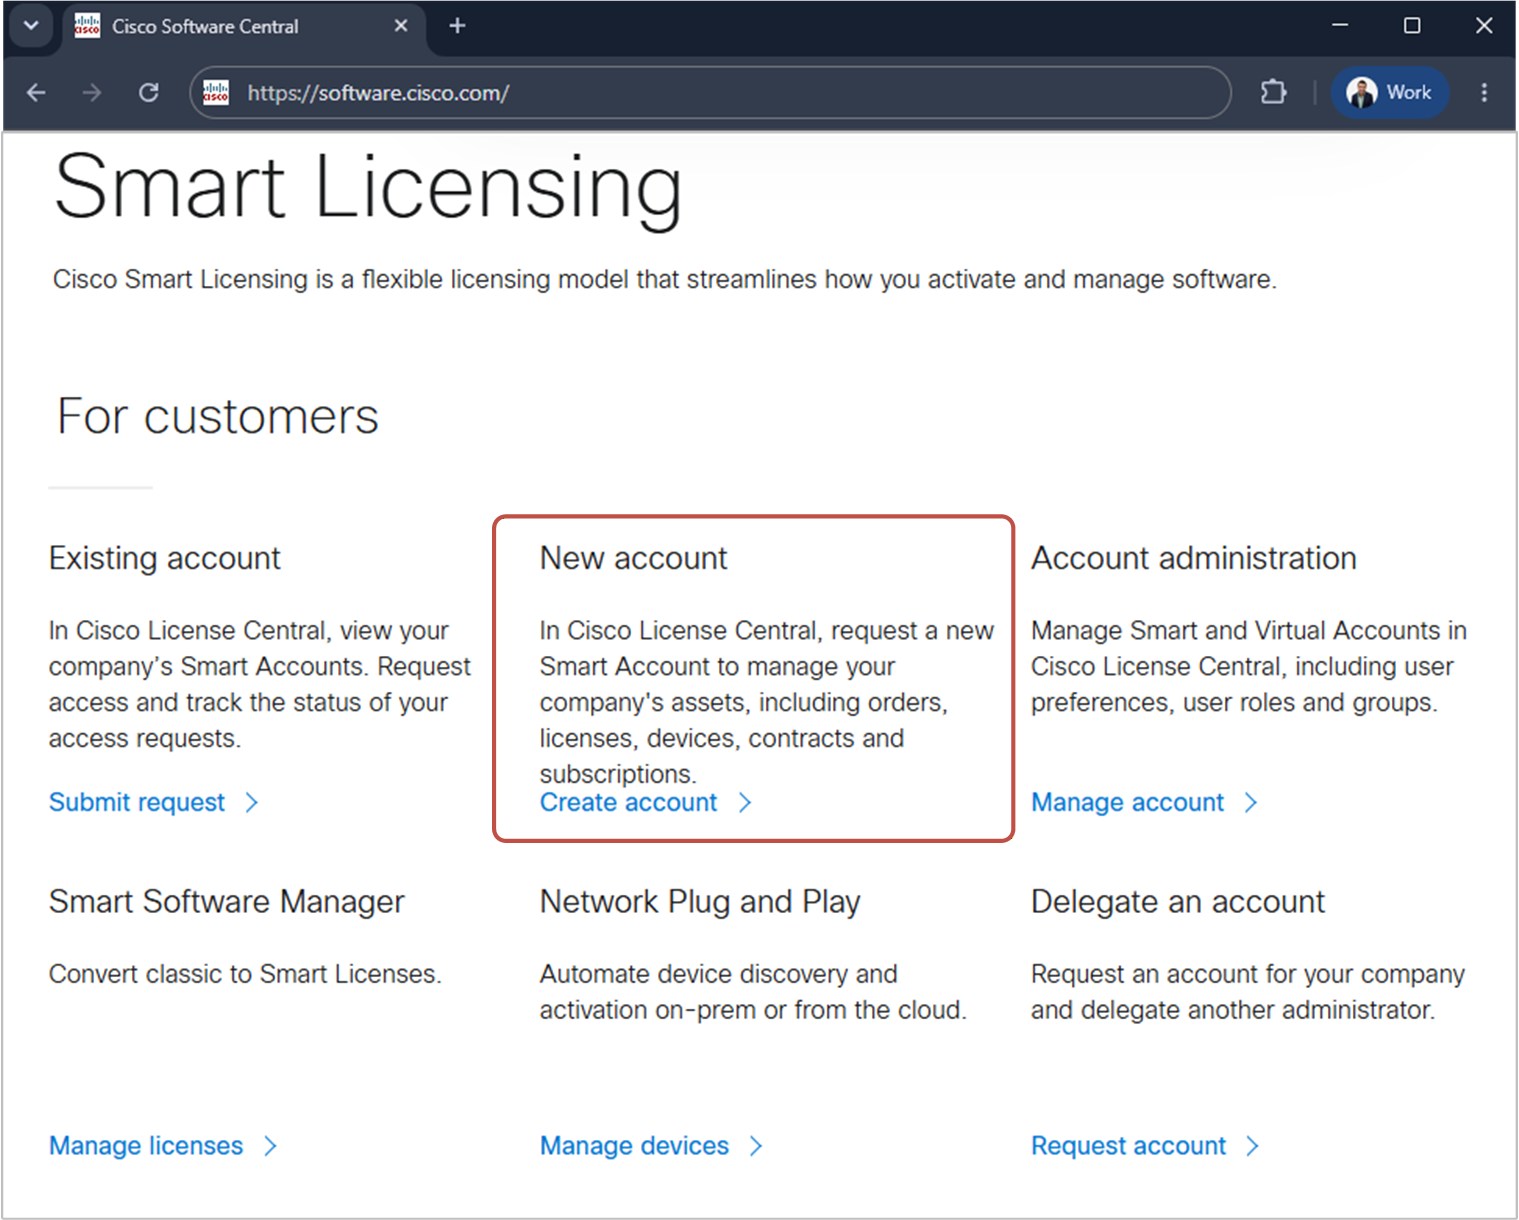
A Cisco Smart Account is created and managed in the Cisco Software Central at: https://software.cisco.com/. If you curretly don't have access to Cisco Smart Account, you have two options to get one.
Option 1: Accessing Existing Smart Account
If you work for an organization that has purchased Cisco devices before, it most likely already has a Cisco Smart Account. In that case, the easiest path for your SD-WAN home lab is usually to ask the Smart Account administrators to create a separate Virtual Account for your lab.
What is a Virtual Account?
A Smart Account is the top-level account. An organization can have only one unique Smart Account. A Virtual Account is a smaller sub-account inside it. The Smart Account owns the assets. Virtual Accounts organize them into logical groupings.
Organizations can create Virtual Accounts to organize assets in a way that makes sense for them. For example, they can organize them by: business unit, product; geography, project, lab environment, production environment, and so on.

A dedicated Virtual Account keeps your lab separate from the real production network.
Option 2: Creating a new Smart Account
If you can't have a corporate Virtual Account, another viable option is to create your own Smart Account. A common misunderstanding is that creating a Smart Account requires payment. Many people assume they will need to enter credit card details or choose a paid subscription.
That is not the case.
Creating a Cisco Smart Account is free of charge. You do not need to provide payment details to create the account. However, there is one important requirement.
To create a Cisco Smart Account, you normally need an email address from a unique organization domain. In other words, you should use an email address such as:
your-name@example-company.comYou should not use a public email address such as Gmail, Outlook, or similar. This is because the Smart Account represents an organization, not just a personal user account. Cisco uses the email domain to associate the account with a specific company, school, or other organization.
To create a Cisco Smart Account, go to https://software.cisco.com/, scroll down to the New Account section, and click the Create Account button, as shown in the screenshot below.
Once you click the Create Account link, you complete all steps, and the request is sent to Cisco for approval. It takes some time (between 24 and 72 hours). Usually, standard Smart Account requests are always approved, as long as the information is valid and the account is tied to a unique domain. Cisco has no interest in denying your SA request. The review and approval process is primarily there to ensure the account is created correctly.
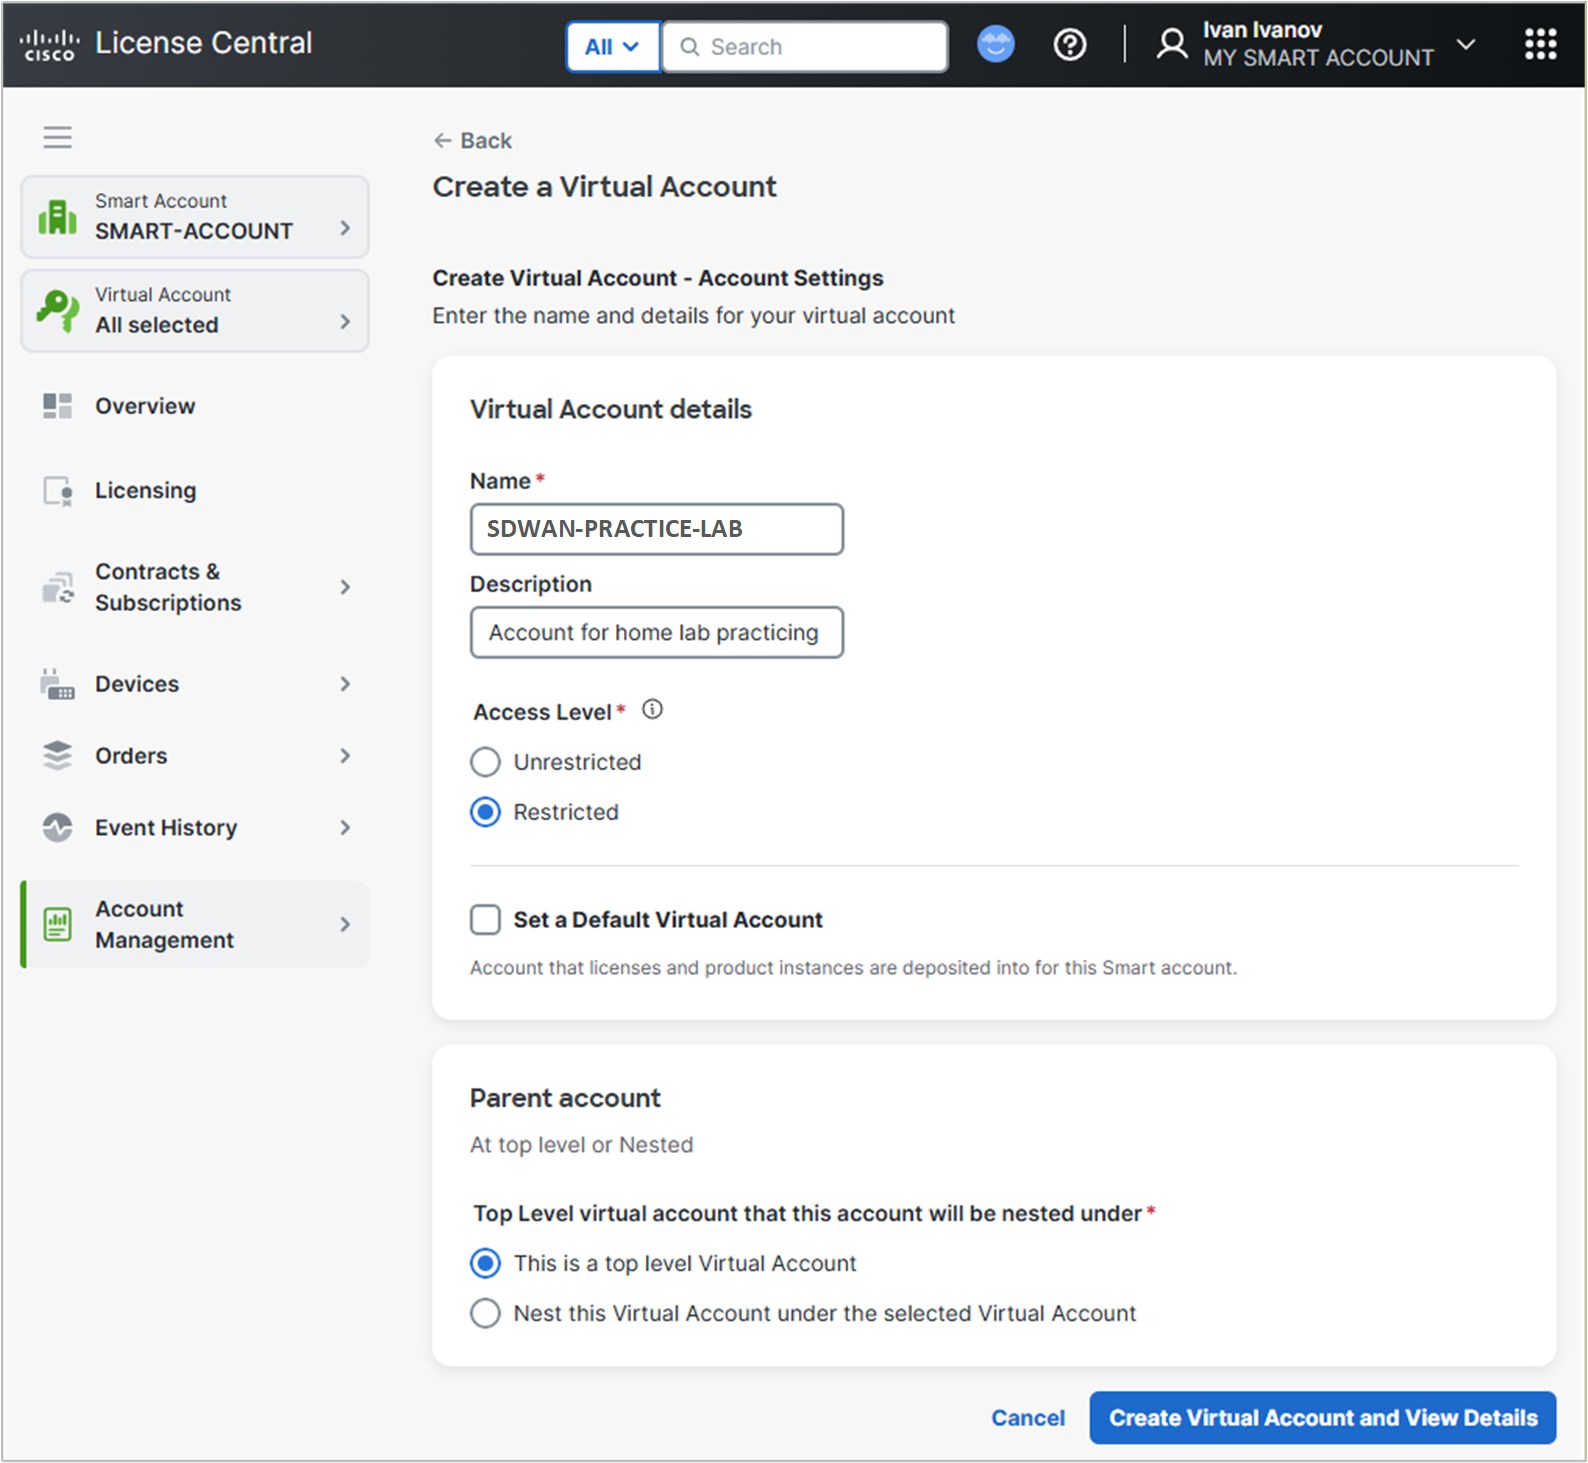
Creating a New Virtual Account
Once the Smart Account is created and approved, you can create a new Virtual Account, as shown in the screenshot below.
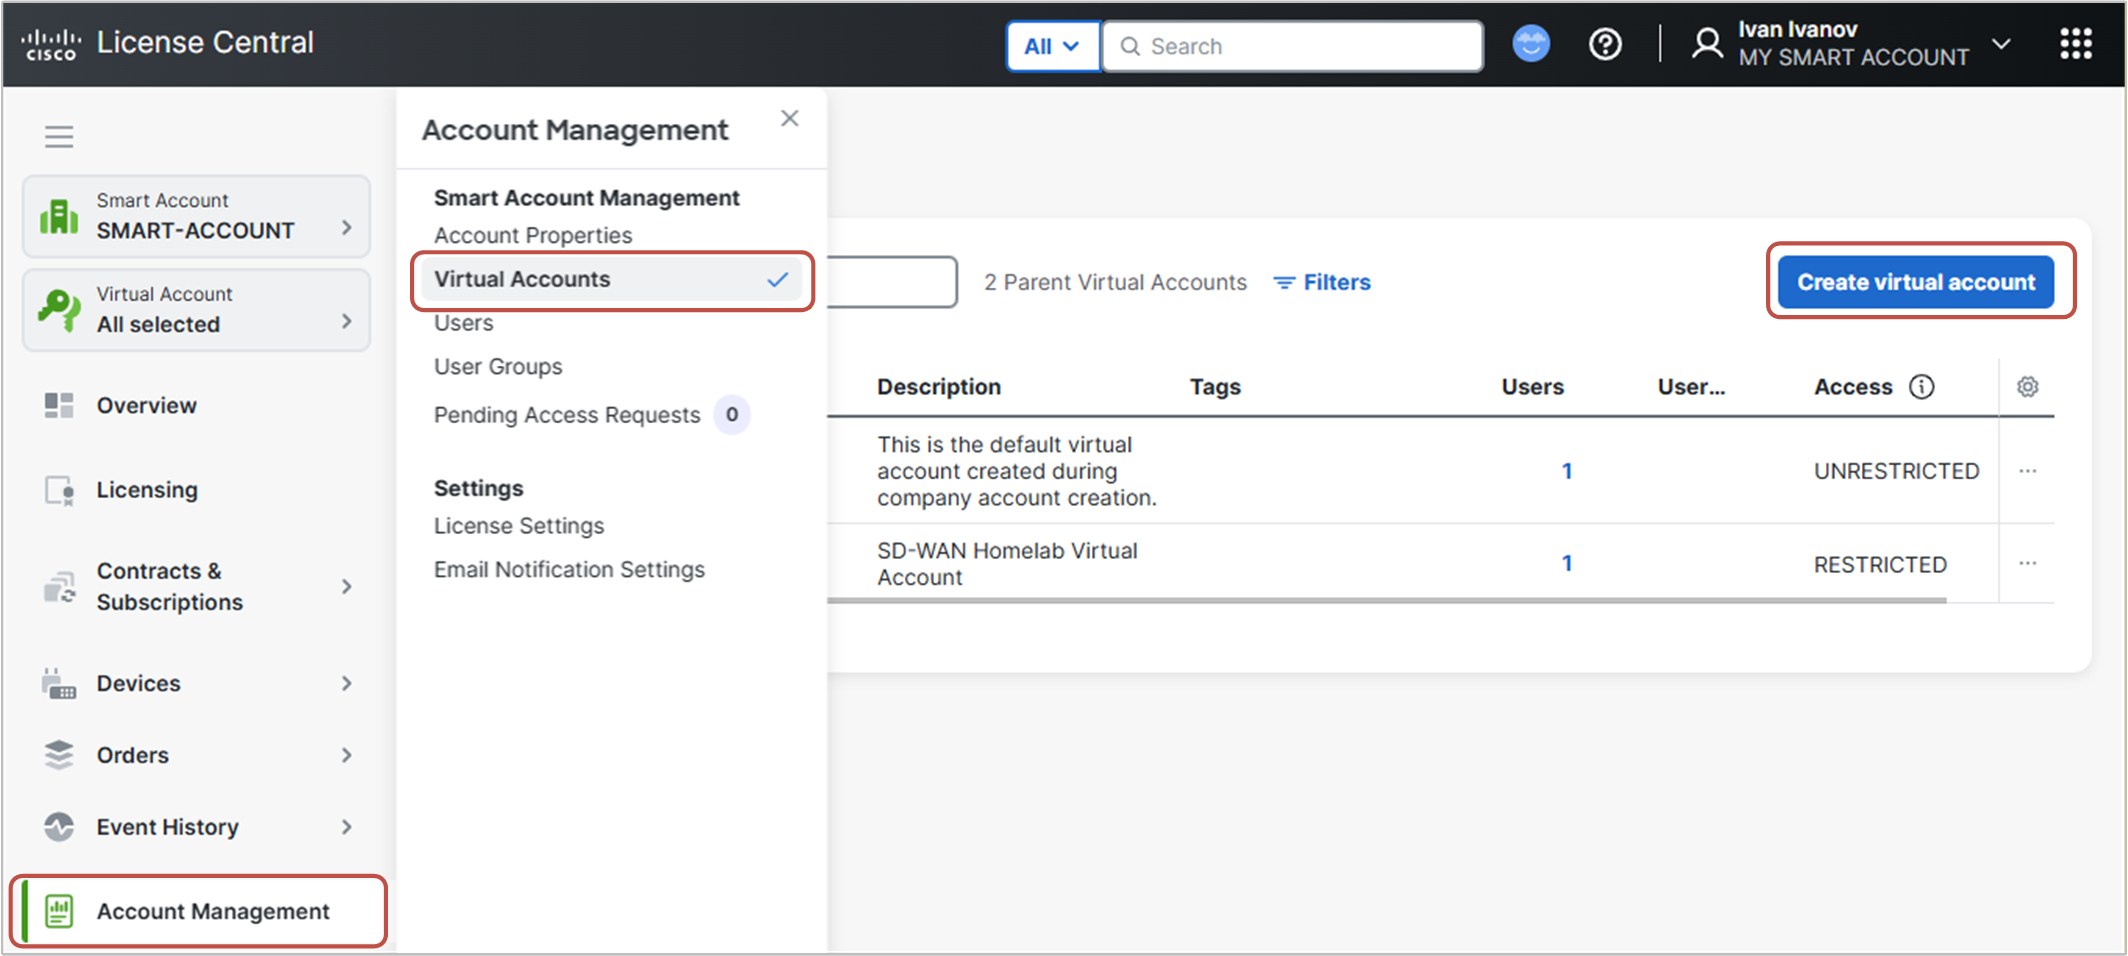
You go to Account Management > Virtual Accounts > Create virtual account and fill all required fields, as shown in the screenshot below.
Now you have everything you need to set up your practice lab. The next steps are to create a Controller Profile, add Software Devices, and download the WAN Edge list. All these steps are done in the Plug and Play Connect portal.
Plug and Play Connect
Once the Virtual Account is created, you go to the Cisco Software Central > Plug and Play Connect.
Change the default virtual account.
Next, you switch from the DEFAULT virtual account to the one you have created in the previous step, as shown in the screenshot below.

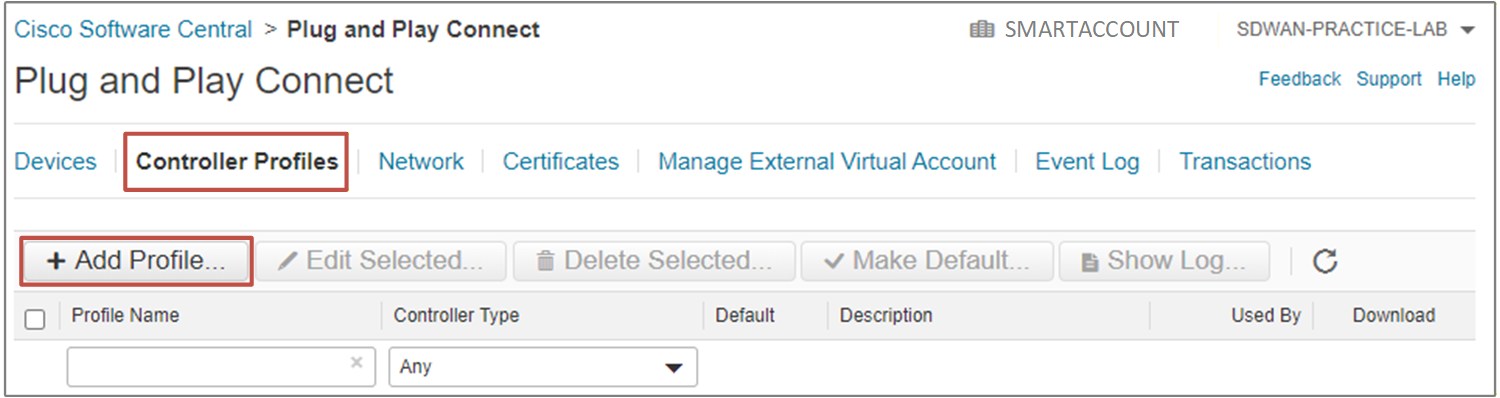
Add Controller Profile
In the Virtual Account, you navigate to the Controller Profile page and select Add Profile. You should add a new vBond profile with the organization name that you will use within the lab topology.
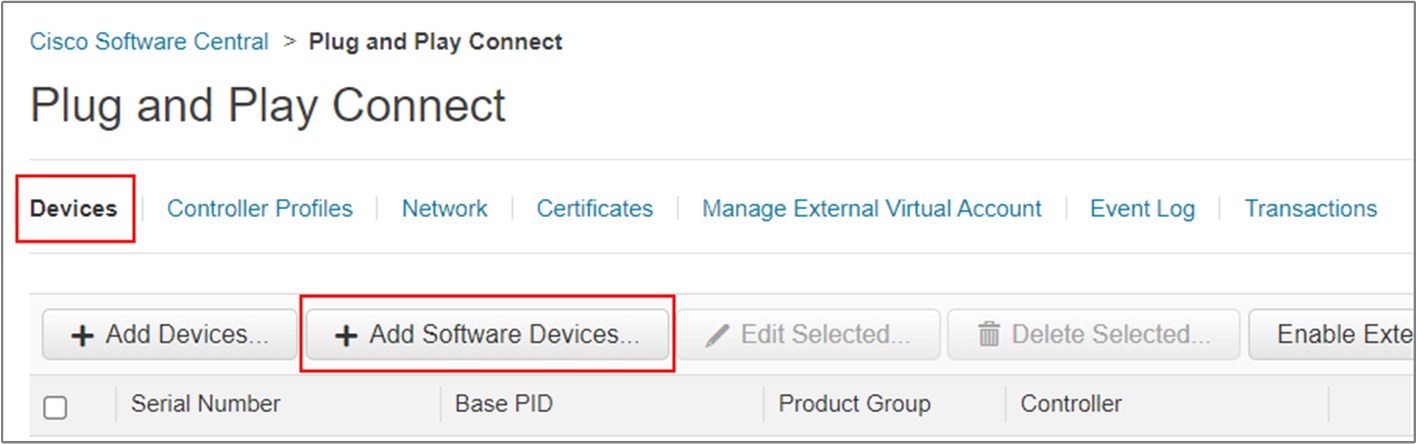
Add Software Devices
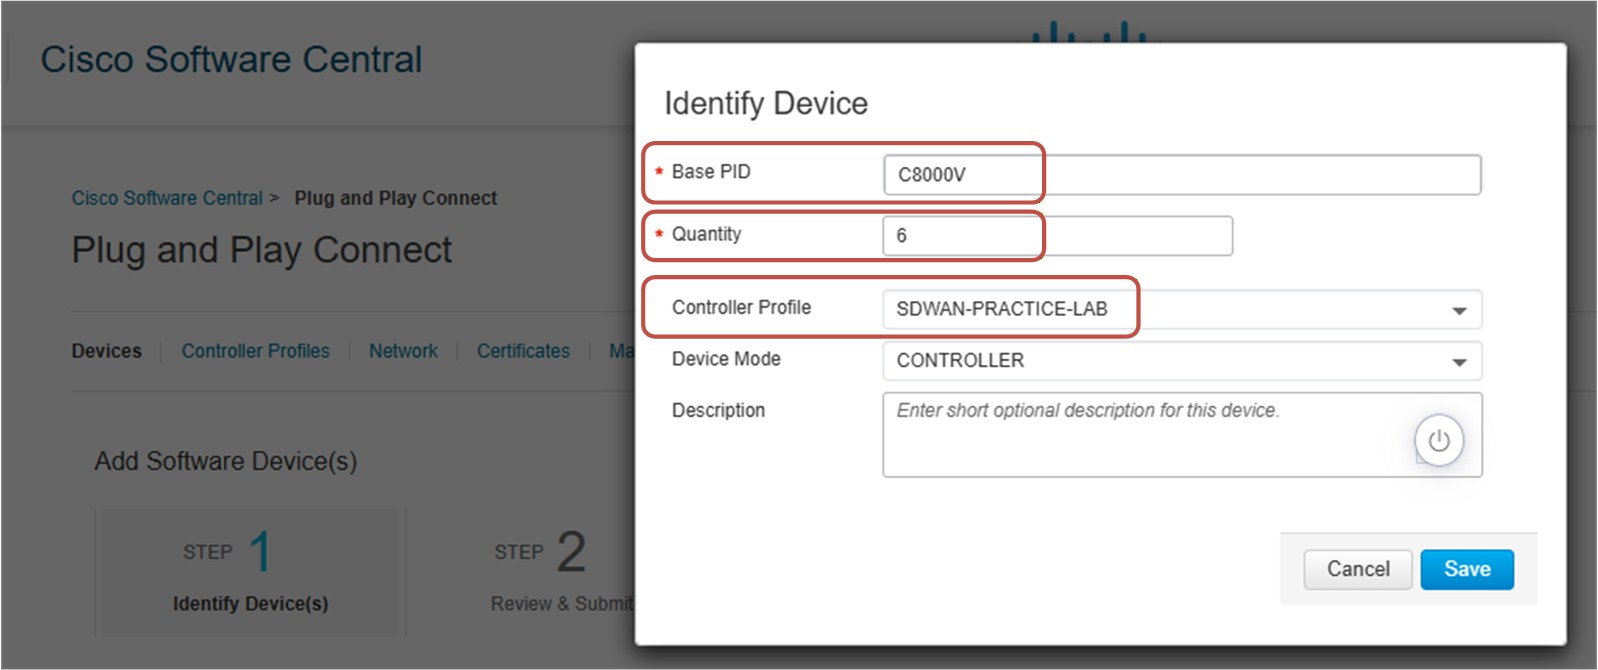
Once you have added the vBond profile, you go to Devices and select Add Software Devices, as shown in the screenshot below.
There, you add as many c8000V cloud routers as you will use in the lab topology and assign them to the Controller Profile that you created in the previous step. For the lab topology used in the hands-on labs of this book, we use six Catalyst 8000V cEdge routers.
Download WAN Edge list
Once you have added all virtual routers that you are going to need, you go to Controller Profile and download the WAN Edge list by clicking the Provisioning File, as shown in the diagram below.
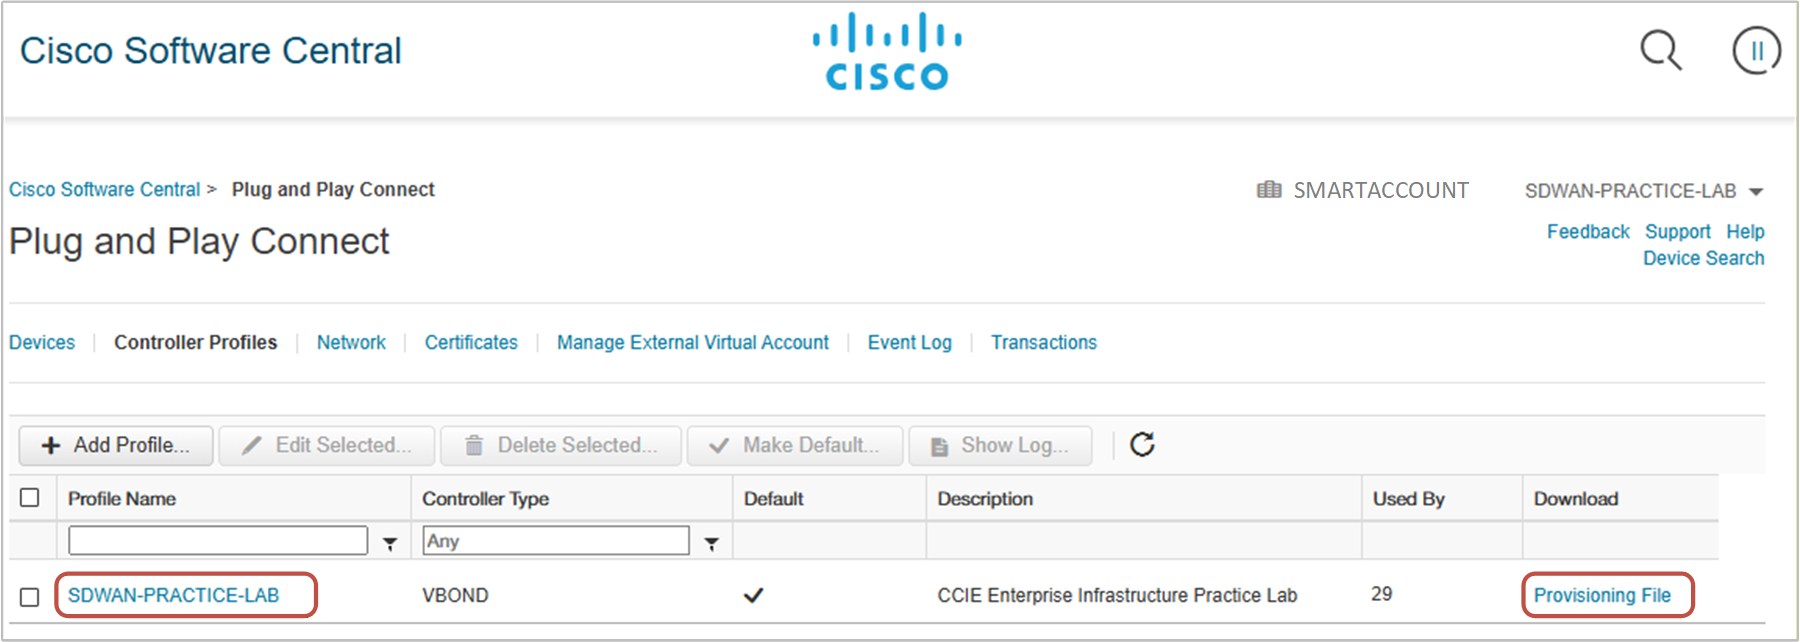
Now you have the required WAN Edge list, which you will later import into the SD-WAN Manager (vManage), as shown in Figure 13.1 above.